
1. What is an azimuth ?
A azimuth is the angle formed between the reference north (geographic north, magnetic north, or map north) and the direction of a given point.
He expresses himself in degrees from 0° to 360° clockwise:
-
0° corresponds to north,
-
90° to theis,
-
180° to south,
-
270° to thewest.
- Example: if a shelter is located directly east of your position, the azimuth will be 90°.
2. The necessary equipment
-
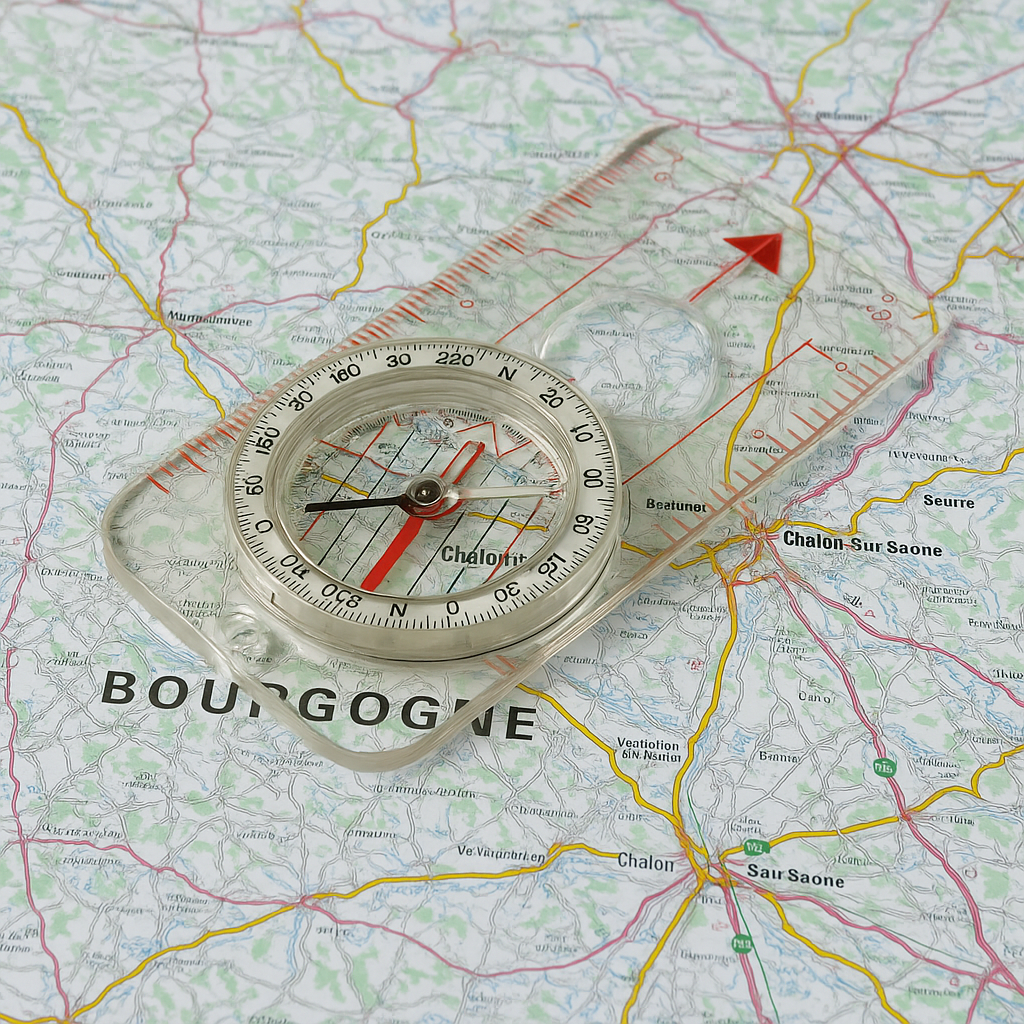
One IGN map at 1:25,000 or 1:50,000 (precise mapping essential).
-
One transparent baseplate compass with graduated dial (0°-360°), sight lines, and millimeter ruler.
-
(Optional) A navigation protractor to verify your routes.
-
Pencil or erasable marker to mark the map.
Step 1: Identify the starting and ending points
On the map, locate:
-
your current position (example: a crossroads),
-
your objective (example: a summit, a hut, a lake).
Draw a straight line between these two points using the compass rule.
- Practical example: You are at the Gloriettes parking (Gavarnie) and wish to reach the Estaubé refuge. You draw a straight line between these two points.
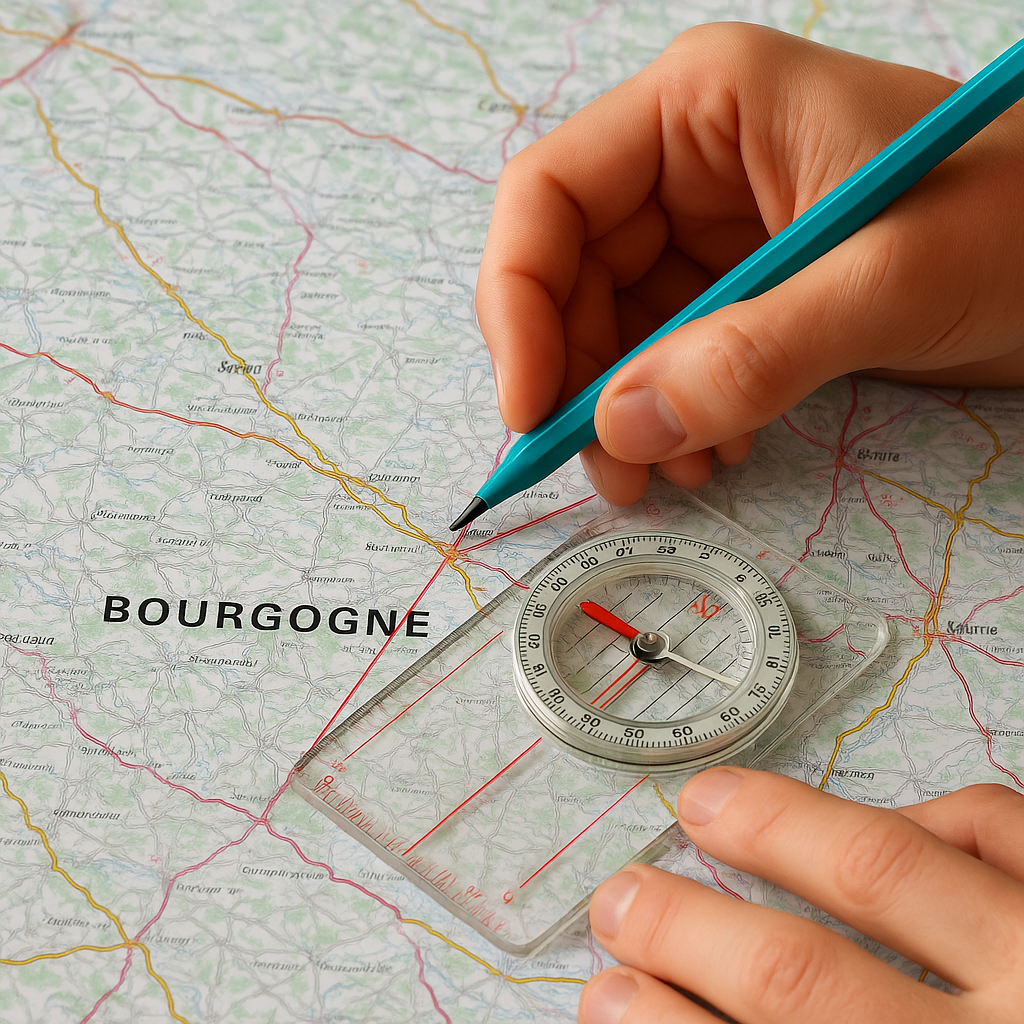
4. Step 2: Place the compass on the map
-
Position the compass so that:
-
The straight edge of the board follows the line drawn between your starting point and your destination.
-
The direction arrow (often red) points towards the target.
-
-
Without moving the compass, turn the dial until the Dial lines are parallel to the Meridians of the map (the vertical lines oriented north-south).
-
The value indicated by the reading arrow (usually at the top of the dial) is theazimuth on map.
- Example: Your dial indicates 72°.
Alignment of a compass on a map – Wikimedia Commons
Step 3: Correct the magnetic declination
The north of the map (geographic north) and the north of the magnetic needle (magnetic north) do not perfectly coincide. The difference is the Magnetic declination, indicated in the margin of the IGN maps.
-
In France, the declination varies between -1° and +3° according to the regions and evolves over time.
-
Example: If the declination is +2° east, you must add 2° to your azimuth chart to obtain the magnetic azimuth to follow in the field.
- Practical example: Map azimuth = 72°, declination = +2° → Azimuth to follow with the compass = 74°.
6. Step 4: Plot the azimuth on the ground
-
Hold the compass at chest height, horizontally.
-
Turn around until themagnetized needle (red) overlaps the dial hand ("put the red in the house").
-
The directional arrow on the sign now indicates the route to follow.
- Practical example: You adjust your body to align the red needle with the north arrow. The direction arrow then points towards a visible ridge in front of you.
7. Practical tips for following an azimuth
-
Use visual cues : rather than constantly walking while following the compass, set a tree, a rock, or a peak in the indicated direction, then walk towards it.
-
Regular adjustment In rough or wooded terrain, take a bearing every 200 to 300 meters.
-
Avoid magnetic disturbances : power lines, telephones, knives, vehicles, etc.
-
Precision : an error of 2° can shift you by several tens of meters after 1 km.
8. Complete example
-
Starting point: Ansabère cabin (Aspe Valley).
-
Objective: Ansabère Lake.
-
On the map, the measured azimuth = 128°.
-
Magnetic declination in 2025 in the Pyrenees: approximately +1°.
-
Azimuth of terrain to follow = 129°.
-
On the field: you set the compass to 129° and fix a visible landmark.
Conclusion
Knowing how to calculate an azimuth with a compass and an IGN map is an essential skill for anyone engaging in hiking, orienteering, or outdoor activities. This method ensures safety and independence, even in the absence of GPS or network coverage.
Regular training, starting with simple courses and then more complex ones, will help you develop precision and confidence.
Products mentioned in this post