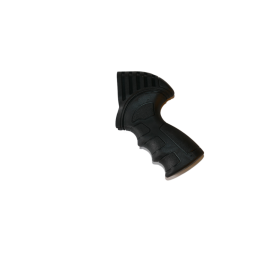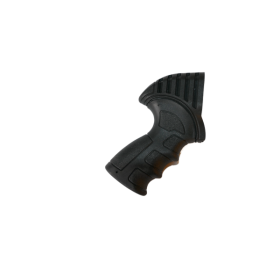

In sport shooting, precision is not just a matter of aiming or equipment: the handling plays a decisive role. A training study shows that simple adjustments in grip and position can measurably reduce the spread of groupings.
The way the weapon is held determines the stability, alignment, and quality of the sight line: a poor grip causes unwanted movements, loss of stability, accelerated fatigue, and deviations on the target. Conversely, a controlled grip improves shooting consistency, accuracy, and the shooter's regularity.
This practical guide on getting started with sport shooting explains, step by step, the elements to master: body position and hand placement, pressure management, the role of the trigger finger, alignment of the weapon-arm-target, synchronization of breathing and release, and simple dry-fire exercises. Try the exercise proposed at the bottom of the page now to feel the difference in your grip.
Understanding the role of taking control
TheWeapon handling is the direct point of contact between the shooter and the mechanical system: it is through it that forces are transmitted and the stability necessary for good aiming is created.
It influences:
- Overall stability — how the weapon remains steady despite the body's micro-movements
- alignment — the continuity between shoulder, arm, and line of sight
- The behavior of the weapon at the moment of firing — recoil, tilting, or oscillation depending on the grip.
A good grip does not mean applying maximum force on the handle. On the contrary, it involves a firm and controlled contact: enough grip to control the weapon, without forcing its natural axis, which preserves the quality of aiming and shooting.
Little dry exerciseTake your weapon (or a secured replica) and feel the "maximum contact" between the palm and the grip without tension. Hold the position for 20 seconds and note if the sight line remains stable; repeat while adjusting the position to feel the difference.
The fundamentals of sport shooting
The grip does not work in isolation: it is part of a coherent set of elements that determine the quality of aiming and shooting.
- The position— Body posture adapted to the discipline (pistol or rifle); when standing, ensure a balanced torso and a consistent lean to maintain the sight line.
- Ground supports— Width and weight distribution influence stability: a support that is too narrow promotes oscillations, while one that is too wide reduces responsiveness.
- General alignment- The shoulder, arm, weapon, and sight line must form a coherent axis to limit muscular compensations and facilitate aiming.
- Breathing— Controlled breathing (diaphragmatic breathing, cue for the release) reduces micro-movements and helps synchronize the release with maximum stability.
- The release — final gesture, it rests on a stable grip, constant pressure, and an independent trigger finger; it constitutes the last step in the sequence that guides the bullet to the target.
Attention: a perfect grip will not compensate for a poor overall position. The grip serves to reinforce an already stable base — work on posture and support first before refining the grip.
Managing pressure
The pressure applied to the weapon is a central element of the grip: too strong or too weak, it degrades stability and accuracy.
Signs of inappropriate pressure: visible trembling, rapid forearm fatigue, shoulder tension, or, conversely, lack of control and oscillations of the sight line. These symptoms indicate that the force applied to the grip is poorly calibrated in relation to the position and weight of the weapon.
The right approach is to apply firm, steady, and controlled pressure—enough to maintain control of the weapon without forcing its natural alignment. In practice, aim for a moderate perceived tension (for example, 3–4 out of 10 on a subjective scale): enough to feel the grip, but not so much that your fingers turn white.
Practical dry exercise : in the usual position,Hold the weapon Unloaded or a replica. Gradually squeeze the handle until you feel slight tension, hold for 10 seconds, then slightly release without changing the alignment. Repeat 6 times while observing the stability of the sight line. If the line moves, reduce the pressure; if the weapon slips, increase it slightly.
Safety reminder: perform these exercises only with a verified unloaded weapon and while respecting the range rules. The ideal pressure varies depending on the position, the type of weapon (pistol or rifle), and the shooter's physique; adjust it with the goal of maintaining constant stability throughout the entire shooting sequence.
The role of the two hands
Main forte translates to "strong hand" in English.
The strong hand (for a right-handed shooter: right hand; for a left-handed shooter: left hand) performs the main functions of controlling the weapon.
It must be stable without being tense. Specifically:
- Hold the handle and maintain the main grip of the weapon while keeping maximum contact that is not painful.
- manage the trigger control: placement of the index finger on the trigger blade for a straight movement
- Define the initial alignment of the weapon in relation to the arm and the shoulder.
Practical steps: place the palm and the base of the thumb in contact, position the index finger so that the action on the trigger is gradual, and ensure that the hand does not become a clenched fist.
Main weak
Often overlooked, the weak hand plays an essential role in balance and the reduction of unwanted movements.
- Stabilize the whole by supporting the rifle or pistol without pressing excessively.
- absorb small oscillations and reduce unwanted movements transmitted to the line of sight
- contribute to the overall balance by finely adjusting the position of the stock or the grip
Practical advice: the weak hand should provide steady support — neither tense nor passive. For a pistol, position the palm and fingers so as to wrap around the grip without squeezing; for a rifle, the weak hand supports the stock or the front of the barrel depending on the discipline.
Dry exercise (weak hand control)Standing up, hold the unloaded weapon; place your weak hand and consciously release all tension in the forearm for 15 seconds while maintaining the sight line. Repeat 5 times and note the improvement in balance.
Reminder: the grip must be adapted to the shooter's morphology and the type of weapon — adjust the position of the right/left hand and the stock accordingly while aiming for a stable hold without excessive tension.
The positioning of the hands
An effective handling is based on three simple but essential principles:
- Maximum contact with the handle— The palm and the base of the thumb must cover the grip to distribute the weight of the weapon without creating painful pressure points.
- High positioning on the weapon— Placing the hand high enough on the handle/stock improves alignment with the axis of the arm and reduces the lever arm that promotes barrel tilt.
- Hand–arm continuity — The hand, wrist, and forearm should form a natural line, without excessive twisting or lateral bending.
The weapon must be aligned with the axis of the arm, without any lateral strain: this facilitates the sight line and the aiming line. In a standing position, check that the shoulder supports the axis, that the right hand or left hand (depending on laterality) is not too low, and that the stock rests comfortably against the body.
Variations depending on the weapon and weight: for a light pistol, the contact of the palm becomes more important; for a heavier rifle, adjust the height of the support hand on the stock or the front of the barrel to maintain balance without strain.
Practical exerciseHold the unloaded weapon in a standing position. Adjust the height of your hand until you feel the continuity between your hand and arm, and observe the stability of the sight line for 15 seconds. Repeat by slightly changing the position to identify the most stable grip according to your body shape and the weight of the weapon.
The role of the fingers
The trigger finger
The trigger finger (or trigger) must operate completely independently from the rest of the hand to avoid any disturbance of the aiming line.
Principles to follow:
- Progressive pressure— Press progressively until release, without jerks.
- Rectilinear motion— The finger must push along the axis of the trigger tail, without pulling sideways.
- Absence of lateral disturbance— avoid any movement that shifts the line of sight at the moment of release.
Practical placement of the index finger: press with the fleshy part of the phalanx (not the tip) for a more controlled movement; adjust slightly according to the travel and characteristics of the trigger of your pistol or rifle.
The other fingers
A common reflex is to squeeze the other fingers at the moment of the shot. This contraction creates lateral forces and alters the grip.
Common consequences:
- trajectory deviation
- additional tension on the forearm and shoulder
- loss of precision and consistency
The pressure of the inactive fingers must remain constant and neutral, independent of the action on the trigger. In practice, maintain a firm but relaxed grip: the other fingers support the handle without contracting at the moment of the movement.
Mastery exercise (sequence)Work dry in five steps — alignment, grip, breathing, focus on the relaxed tail, gradual pressure until simulated release. Repeat the sequence slowly 10 times; film yourself if possible to check for the absence of lateral finger movement and the stability of the other fingers.
Note: The ideal placement of the index finger and the trigger travel vary depending on the firearm model. Test and adjust by prioritizing the simplicity of the movement and the consistency of the motion.
The arm/weapon alignment
Stability is based on a coherent and reproducible axis:
Shoulder → arm → weapon → target
To maintain this axis, the line of sight (front sight → rear sight → aimed point) must remain centered on the target without straining the posture. Any disruption (wrist twisting, excessive raising or lowering of the arm, shoulder movement) requires muscular compensations that reduce stability and increase fatigue.
Practical landmarks:
- Check itlineBetween the shoulder and the handlebar: the axis must be natural, without exaggerated rotation of the shoulders.
- Control theheightThe barrel and the sight position so that the aimed point corresponds to the center of the target without sudden adjustments.
- For acarbineMake sure the buttstock is supported on the shoulder and that the axis is continuous; for a pistol, the hand-arm alignment remains just as critical.
Alignment exercisePlace a marker above the target and hold the aim for 15 seconds, trying to keep the sight centered on the point. If the sight drifts, identify whether the problem comes from the shoulders, the wrist, or the height of the hand, then gradually correct the position until you achieve a stable line.
Objective: a reproducible line and axis that systematically place the sight at the center of the target, an essential condition for accuracy and consistency.
The link with breathing
Breathing directly affects the micro-movements of the body: inhaling or exhaling changes the position of the thorax, shoulders, and torso, and therefore the stability of the sight line.
An unstable grip amplifies these variations; conversely, a proper grip helps absorb the oscillations related to breathing and allows maintaining sufficient stability for aiming.
Recommended technique for precision shooting: adopt calm diaphragmatic breathing, then allow a brief natural pause at the end of the exhalation (1–3 seconds) to execute the shot release. Do not hold your breath forcibly and for an extended period — this creates tension and negatively affects performance.
Simple exercise (standing position)In the usual position, take three deep breaths, then exhale slowly and hold the aiming position for 2 seconds before simulating the release. Repeat the sequence 8–10 times, noting the stability of the aiming line with each repetition.
Adapt the sequence according to the level and type of shooting: for rapid shooting, shorten the breathing tempo and synchronize the aiming with the natural breathing cycle rather than with a prolonged pause.
The moment of release
The release is the most critical moment of the sequence: any variation in the grip or pressure is immediately reflected on the target. Follow a reproducible routine to minimize errors.
- The plugMust remain the same — no repositioning, no change of support at the moment of the shot.
- PressureShould not vary — maintain a constant force on the handle throughout the entire sequence.
- Only the trigger fingerThe (release lever) must be in motion, with a gradual and straight support.
Recommended sequence (preparation for the release): alignment → aiming line control → breathing (small natural pause) → maintaining grip and pressure → action on the trigger. Follow this sequence for each shot to automate the movement.
Practical exercise (shooting sequence)Perform 10 dry-fire repetitions strictly following the sequence above. Focus on maintaining consistent pressure and the exclusive movement of the index finger/trigger finger. Film yourself or ask for feedback to verify the absence of any unintended movement of the hands or torso.
Tip: Work in slow sets to integrate the mental routine and the movement — controlled repetition strengthens muscle memory and improves consistency on the target. Do not change your grip or pressure at the last moment: these are the best ways to avoid errors related to the release.
Common mistakes
- General tension— excessive tension in the hands, forearms, or shoulders that weakens stability.
- Irregular pressure— Variation of the force on the handle during the sequence, source of deviation from the aimed point.
- Incorrect hand position— grip too low, too high, or wrist twisting causing an inconsistent sight line.
- Involuntary action of the secondary fingers— Clenching of inactive fingers or lateral movement of the index finger upon release.
These errors are often subtle but have a direct impact on accuracy and consistency.
DetectionUse slow-motion video or a training partner to spot any tension, pressure variations, or deviation of the sight/handlebar. While stationary, note how it feels (fatigue, tingling) and observe the spread on the target.
Quick corrections:
- For tension: relaxation exercises between sets, deep breathing, and dry training focused on relaxation.
- For irregular pressure: train consistency with slow sets and a subjective reference point (e.g., tension 3–4/10).
- For the hand position: adjust the height and the continuity of the hand-arm, test dry, and observe the impact on the sight line.
- For the action of the secondary fingers: repeat the sequence focused on the trigger tail and film yourself to confirm the absence of any unintended movement.
Self-diagnosis checklist: tension? constant pressure? sight line centered on the front sight? fingers inactive and still? Use this list at each session to systematically correct any detected problems.
How to train effectively
Dry firing (unloaded weapon) is the foundation for correcting the grip without the constraints of shooting. It allows isolating the position of the hands, the placement of the stock, and the trigger finger movement in complete safety.
Visual analysis — ideally by video — helps detect tension, pressure variations, or unwanted movements on the handlebar line → target. Film from several angles (profile and front) to spot defects and measure your progress.
Prefer slow and structured work: a conscious shooting sequence (alignment → breathing → hold → release) repeated slowly strengthens understanding and facilitates correction. The repetition must be controlled: each repetition counts, then analyze and adjust.
Sample program (30–40 minutes, adaptable to the level):
- Warm-up 5 min: light stretches and deep breathing.
- Dry work 10–15 min: position, grip, pressure control, and firing sequence without shooting.
- Slow series 10 min: controlled shots at the range (or simulations) focusing on consistency of grip and trigger control.
- Return 5–10 min: visual analysis / notes, simple adjustments for the next session.
Examples of targeted exercises: holding the weak hand for 15 seconds to work on balance; 10 repetitions of progressive pressure on the trigger to automate the movement; slow series while checking the sight line and the front sight with each shot.
Safety rules: always check that the weapon is unloaded for dry firing, follow the range instructions for exercises with a live weapon, and adjust the intensity according to the level. Favor simplicity and controlled repetition rather than sheer quantity.
Impact on progression
A well-controlled handling directly impacts several performance levers:
- Stability— A consistent outfit reduces oscillations and stabilizes the line of sight, which makes it easier to center on the target.
- Regularity— A reproducible shooting sequence (identical grip, constant pressure, controlled release) reduces the variability of shots.
- Precision— By limiting errors related to the grip, the groupings become tighter and the shooter more often places the projectile at the center of the target.
- Fatigue management — A grip adapted to the weight of the weapon and the morphology reduces unnecessary effort, delaying fatigue and maintaining the level of performance over time.
Simple indicators to measure progress: reduction of the average grouping diameter (mm), increase in the percentage of center hits, decrease in dispersion over series of 10 shots. Over several weeks of structured work (dry firing + slow series), many shooters notice a significant improvement in accuracy and stability.
Practical advice: track your sessions (position, grip, weapon weight, perceived tension levels) and note the indicators above. A monthly plan focused on controlled repetition and visual analysis allows you to quantify progress and adapt exercises to the level.
Conclusion
The way of holding the weapon must be considered as the essential technical foundation in sport shooting: it determines the quality of aiming, precision, and the shooter's ability to make lasting progress.
Mastering your grip, whether you are shooting with a pistol or a rifle, means stabilizing the entire system (position, sight line, release) and reducing errors at the source, all while respecting safety.
Three simple actions to try starting today: 1) 10 minutes of dry practice focusing on position and palm-to-grip contact; 2) 5 slow repetitions of the shooting sequence (alignment → breathing → hold → trigger tail) while filming the movement; 3) a relaxation exercise to eliminate hand tension.
Simplicity and consistency pay off: incorporate these routines according to your level, track your progress, and seek help from a coach or official resources if needed to go further.
@chassetir21 on YouTube
Products mentioned in this post